Beating Heart Teddy Bear

This tutorial will show you how to take one un-animated image,
and add an animated gif to it.
If you don't want to make the heart, it is provided later in the tutorial.
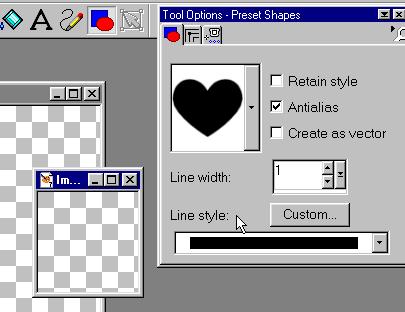
Open a transparent image 100x100
I have black as the outline with a red fill.
I use the heart shape and make a small heart.
duplicate the layer.
use the deformation tool to resize the heart smaller.
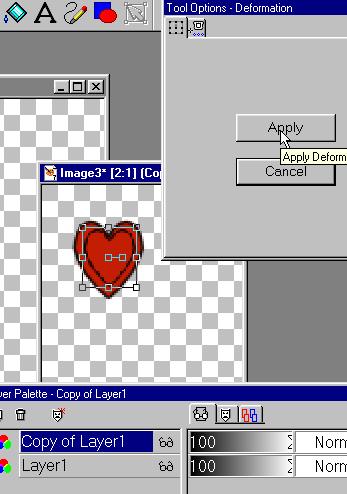
Duplicate the layer and resize smaller once more.

You should end up with this.

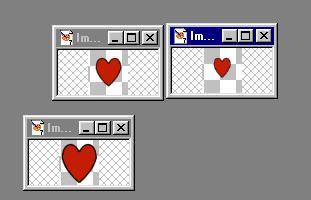
Do not drag off or copy and paste the layers into single
layers.
You will lose the overall size and the hearts will not beat correct.
CTRL D to duplicate the heart image to a total of three.
delete the layers until one has the large, then med, and small heart.
Save each as a psp file
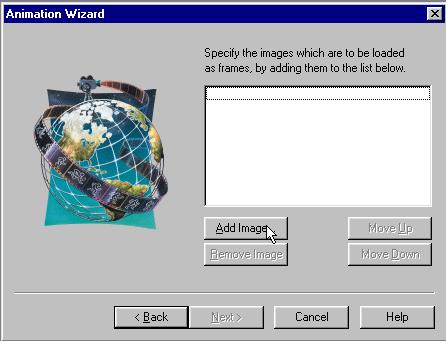
Open Animation Shop
Click on the wizard, click on the default ok
then click on add image, and pick your three psp images.
You should have the hearts from small to big.
If not, copy and paste in the correct position.
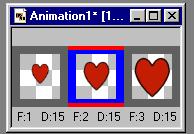
Click on the second heart, copy, click on the large heart,
Paste after selection so the loop will go
small, mid, large, mid
So the heart beats smoothly. :)
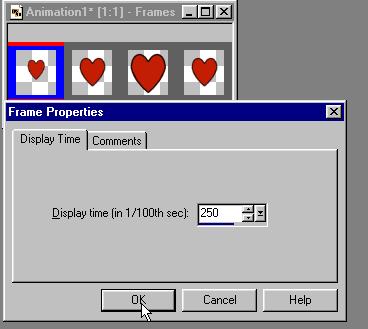
Set the delay on the first heart to 250. The rest 20.
save as a gif.
![]()
Here is the heart if you don't want to make one.
![]()
click on the first frame of the heart, hold the CTRL down and
click on each of the other three frames
so they are all active (Blue). Copy, click on the last frame, paste after
selected frame. so It looks like this.
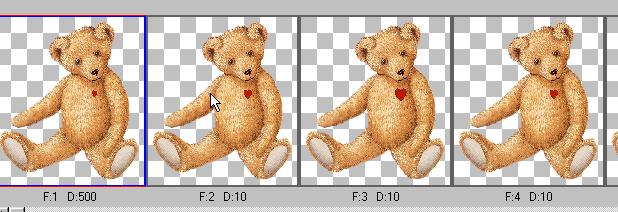
8 frames. The bear is not animated. Just duplicate it so there are 8 bear
frames.
Click on all the heart frames again, copy.
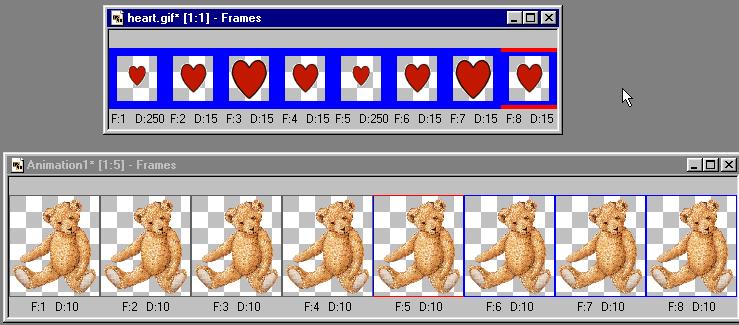
Click on all the bear frame to so each one is activated (blue)
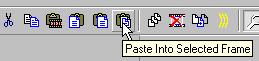
Paste the hearts you copied into the selected frames of the bears (all of the
frames)
This is a close up, position the 1st heart.
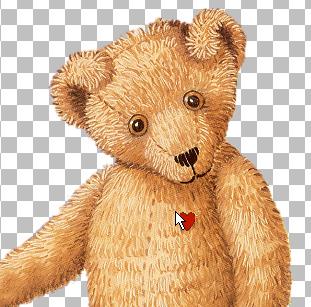
You see the hearts are positioned in the same spot in all 8 frames.
Test it and save your new creation!
A note...
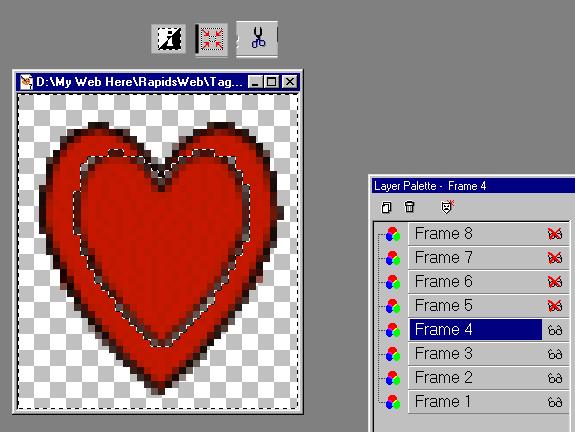
I did notice that when I saved the hearts, they got that
annoying 1 pixel boarder on them. So opened the heart gif
I just saved, Clicked on all the frames, and exported them to paint shop pro.
There I clicked on each layer in turn, selected the heart with the magic wand,
inverted the selection so it was around the heart only, contracted the selection
one pixel,
inverted again, then cut the 1 pixel away. Do this with each layer.
Then update back to animation shop, and close the one in psp.
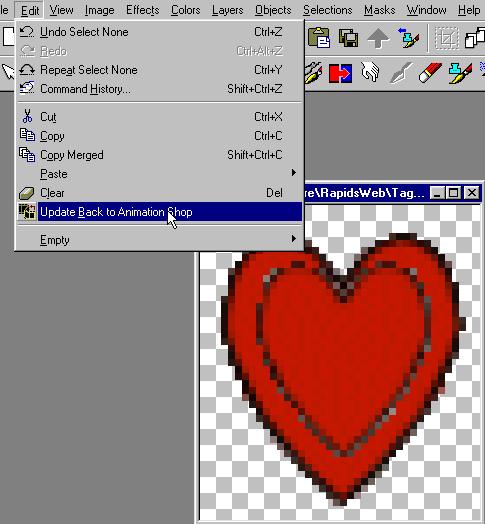
Now when you save it, those pixels will stay gone!
A lot of extra work but worth it when it's done.
