|
Girl Runs with Goose
by
Pat
May

When I started this tutorial, I was using a tube with 2
geese...and in mid stream decided to use only one. But since I had
already made the snaps of the directions, I an going ahead and use
them, but I have included both tubes incase someone elects to use 2
geese instead of one.
As you can see it has to animated tubes and the
goose appears to be walking across the top. Making this is not
nearly as complicated as it looks, so if you are interested,
download the zipped file and lets get on with
it!
As
usual, I like to work with plenty of room (and usually have my
signature tags large, but easy to decrease size in animation
shop). (The above one is 75%) So, open a new image size
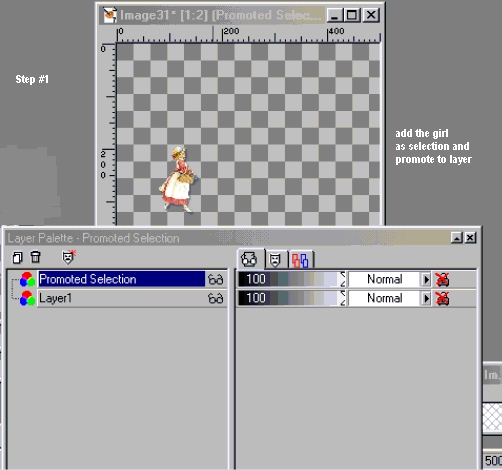
500X500. Copy the girl as a New Section and paste to your
image, add your shadow and promote her (floating section) to a
layer.
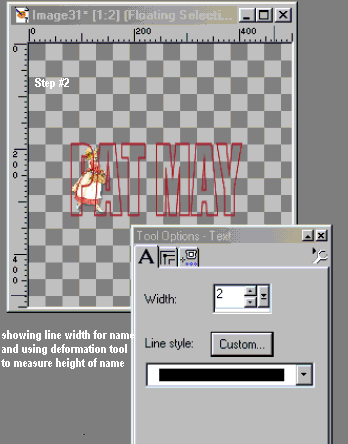
Using Impact in caps, type your name/message in size 72. I
use colorC74B48 for my name. Be sure that your background
color is closed and the line is set to 2. Go to
Effects/emboss, but do Not add a shadow to your text. Use the
deformation to enlarge it enough for the girl to move easily
inside the font. Once you are satisfied, promote the text as a
layer.
We are
now ready to copy and paste your other tubes to your
image..Again add each one as a new section, bevel if you want, add
your shadow and promote each one as a new layer. (This allows
you to change your mind if you don't like where something is or it
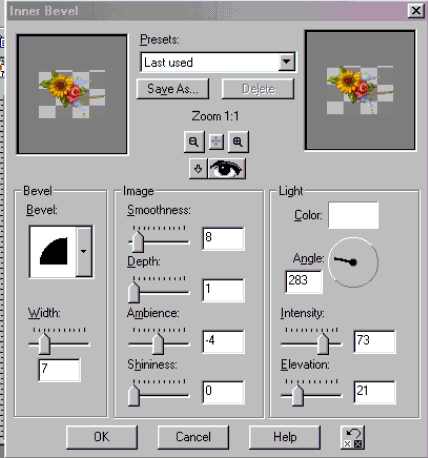
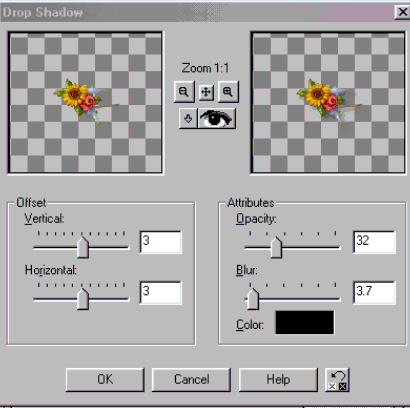
doesn't fit) Below is the settings I used for the
bevel I used on the flowers. If you use the single goose, you
will probably want to apply both 3 and -3 vertical and horizontal
shadows...The goose's head seems to disappear without a
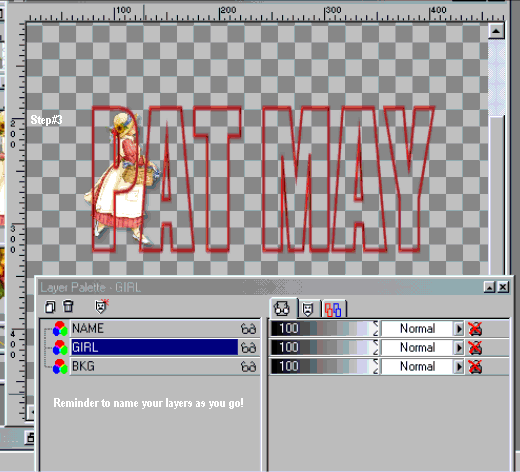
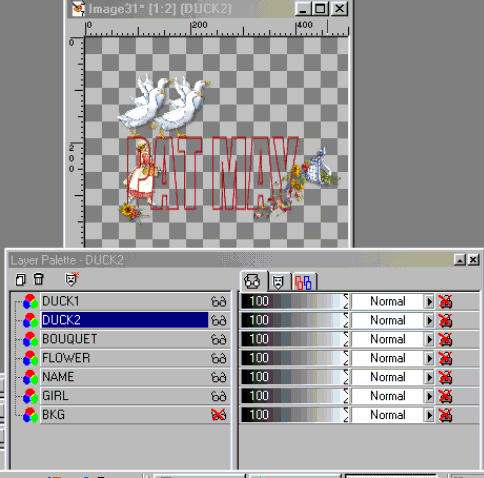
shadow. Your layer palette and image should look something
like this.
You are
now ready to place your flowers on your name...Once you are
satisfied. Merge the 3 layers Visible and don't forget to rename
it.
From this
point on you need to be very conscious of where your make your
placement of the goose and girl in each layer. I always
duplicate only what I need. I think this is a good habit and
keeps me from getting confused and having zillions of layers to try
and figure out what they are.
X out all
your layers except the new duplicated copy of your name and the
duplicated copy of the girl and goose 1. Move these images to
the bottom....X out the image of the girl and goose. Using the
magic wand, click one time anywhere outside the name. You
should now have ants marching around the name and the outside edge
of your image. Open the duplicated copy of the girl, being
sure that place of the girl is BELOW the name layer. Using
your mover, place just a small section of her inside the name.
Go to Edit/Clear and click o.k. All of the girl should be gone
except the tiny bit you left inside the name. DO NOT
deselect your image. You are now ready to add your first goose
to the top of your name. I have numbered them 1 and
2. Use them in numerical order. first 1 on image 1,
2 on image 2, 1 on image 3, etc. Place the goose close to
the left edge of your name, merge the three layers Visible and
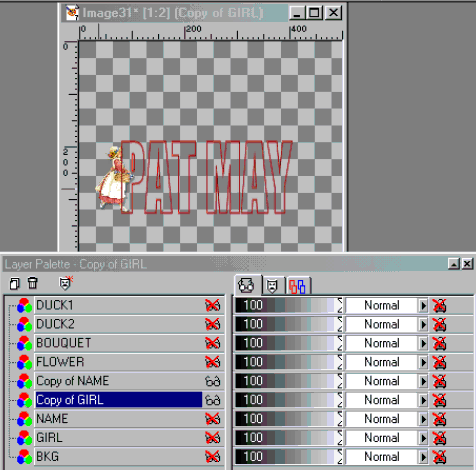
name it Image 1. I do not add a background until I am
finished so that I can open the layer below to check placement
of my images movement. Your image and layers should now look like
this.
Duplicate
your name again and the girl again and duplicate a copy of goose
2. Move these 3 images on top of your first merged Image
l. Your ants are still active, and you want to move both your
girl and Goose 2 further to the right. But REMEMBER, NEVER ADD
YOUR GOOSE UNTIL AFTER YOU HAVE PLACED AND DELETED THE PARTS OF THE
GIRL OUTSIDE THE NAMEAND THAT THE GIRL IS BELOW YOUR NAME.
I always leave the image just below active until I am
satisfied with my placement then I X it out, add my goose 2,
reopen the layer below to check for placement, close it and merge
the 3 layers, naming it Image 2.
Continue
duplicating the images, deleting the parts of the girl that is
outside the name, adding your goose/geese until you reach the end of
your name. The next to last image will have the barest amount
of the girl showing, (as you did with your first image).
Your very
last image will not have any of the girl showing. Instead,
just place your goose/geese at the end of the
name.
You are
now ready to add your background to each layer, again remember
to rename them so you won't loose one.
:O))
The
length of your name will determine the number of layers you
have. If you have an extra long name such as Veronica, you can
move the girl further apart than I did. The speed of the
animation will make it look the same as mine with only 6
letters. This is something you need to play with. I used
75 on my first frame, l00 on the last frame and 50 on all the
others. You will need to play with these numbers until you are
satisfied.
Once you
have finished, be sure to uncheck all the layers before saving as a
PSP image and taking it to Animation Shop.
I hope
that you have enjoy this tutorial and that didn't make it to
wordy. Please let me know what you think after you try
it.
If you
decide to use images other than what I have furnished you for this
tutorial, be sure that the image moving through the name is facing
laterally(to the side)
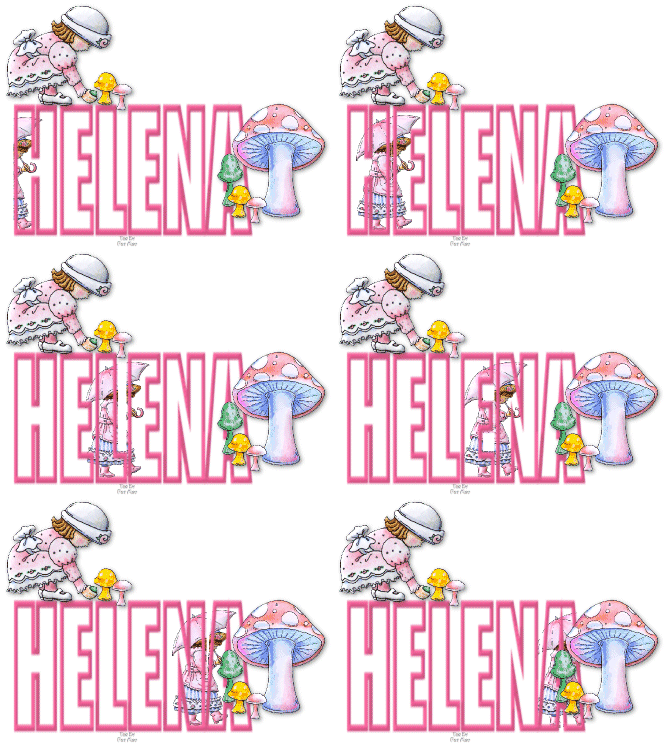
If you
only want to make one with an object moving through your name, you
can apply an extra image to the top when you add your flowers and
animate only the image in the name. I have included a couple
of examples below for you.

|