
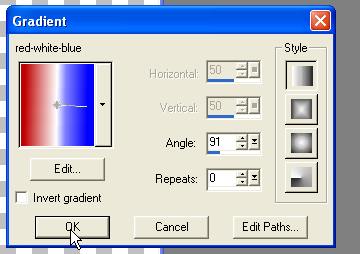
Download the zip of
the red-white-blue gradient.
Save to your gradient folder in psp
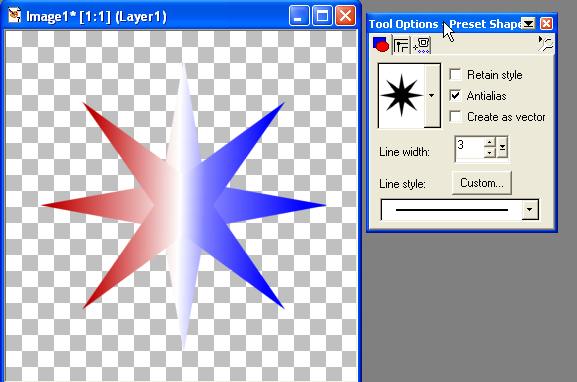
Open a transparent image. 350-350
Add a star shape using the gradient fill.
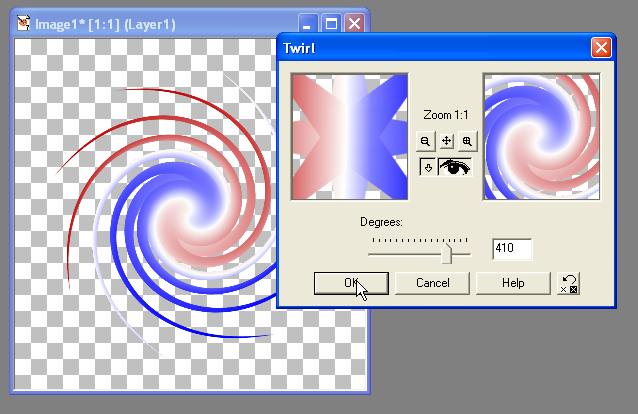
Effects twirl
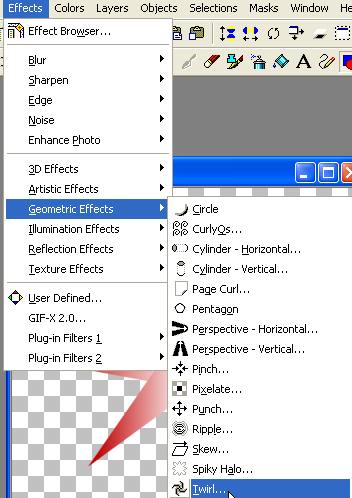
The more centered the star is, the more even the twirl effect
Then apply the blast em filter.
That filter can be found in the paint splatter tutorial
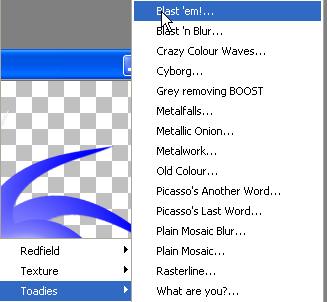
This is the setting I used

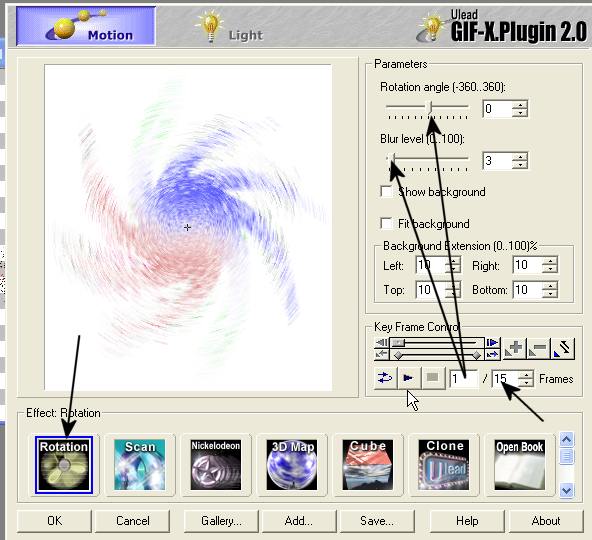
Now click for the Ulead Gif animator plugin

Click for Motion/Rotation/
set the parameters at frame 1 - blur 3 and rotation angle 0
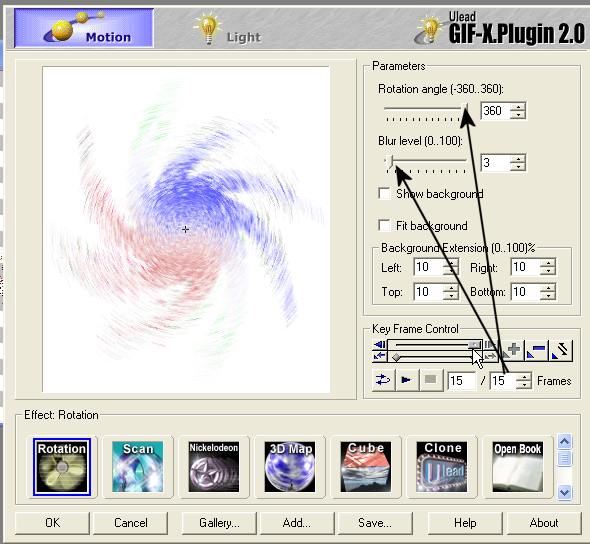
Then move the slide bar over to frame 15
and set for 3 blur and 360 angle, Save - don't just click OK
after you save it, click on Cancel.
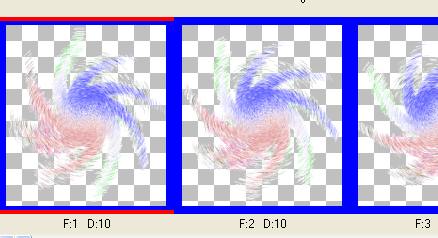
Open Animation Shop and the whirl
I wanted mine on a stick, so I opened a 350-350
image in psp and made a stick. Saved this image
and opened it in AS. If you copy and paste from psp to AS the space around the
stick will be lost.
Duplicate the stick frame a total of 15 times to match the number of whirl
frames.
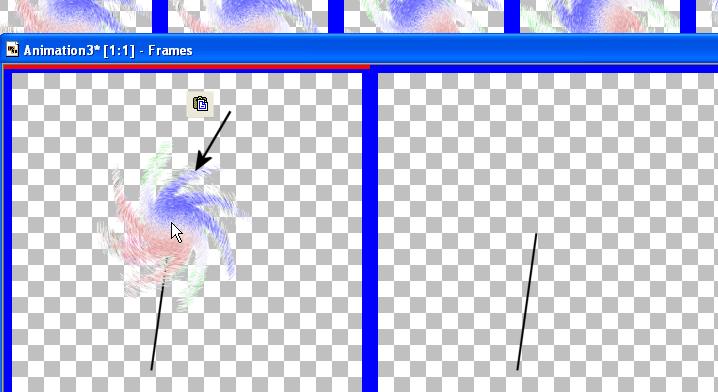
Click on the whirl animation/CTRL A to select al the frames/COPY
Then click on the stick frames/CTRL A/ paste into selelcted frames. *note the
icon to do this. Position in place.
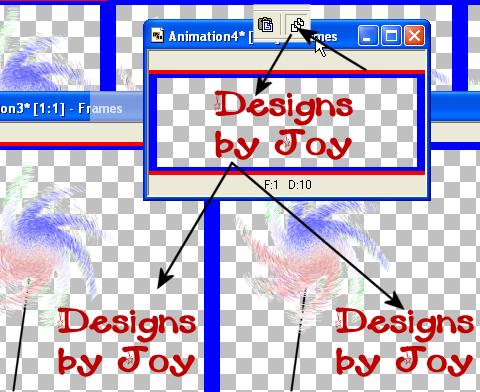
I then opened a small image in AS for my name.
Making sure all the frames in the completed whirl animation are selected
(CTRL-A)
Click on the paste icon shown
(This icon means paste in all selected frames in the same spot)
I place mine just slightly over the edge of the whirl...so my name can't be
easily erased
by someone wanting the effect.
Now File/Optimize using the custom to pick the
color of your background,
and save your new whirl-e-gig.